This time, we’re going to talk about How To Make A Small Jewelry Box Out Of Wood. There is a lot of information about 21 Pretty DIY Jewelry Box Ideas that will De-clutter Your Room on the internet, of course. Social media are getting better and better quickly, which makes it easier for us to learn new things.
Diy Jewelry Box Kit and Guide to Handmade Wooden Jewelry Boxes are also linked to information about 27 DIY jewelry box Ideas: Homemade Jewelry Boxes. As for other things that need to be looked up, they are about How to Make a Small Wooden Box for Jewelry and Small Storage for Kids and have something to do with How To Make A Small Jewelry Box Out Of Paper.
151 Fun Facts How To Make A Small Jewelry Box Out Of Wood | Simple Wooden Jewelry Box
- This blog post suggests that making a jewelry box like this would be a great idea for a Valentine’s Day gift. It’s rated as an intermediate level project, but as long as you have a few basic DIY skills, it shouldn’t be too hard to copy. You can expect it to cost around $20-50 to make, but it will be worth far more than that just to see their reaction when they unwrap it on the special day! - Source: Internet
- Select a crosscut tenon saw with almost no set (better for hardwoods) around 14 to 20 teeth per inch (tpi). A thin blade is good too. My preference is for a traditional European tenon saw over a Japanese pull saw because I find they are more accurate. It is important to get the components the same length and square to the top and bottom; otherwise your box won’t be square. - Source: Internet
- Each week we’ve been sharing fun and easy stencil tutorials on our Facebook page. Make sure you like the page so you don’t miss out on these inspiring projects. This week we shared how to enhance a wooden jewelry box purchased at Michaels for $5.99 using the Nagoya Card Stencil Template. For those who love tutorials, you will love this instructional video. - Source: Internet
- The jewelry box quickly became a popular item and many people began to use them to store their jewelry. The jewelry box was a great way to keep your jewelry safe and organized. Today, jewelry boxes come in all different shapes and sizes and are made out of many different materials. - Source: Internet
- Your box is almost complete now — only the important steps of sanding and polishing remain. I start sanding with 120 grit sandpaper to remove any grain tear-out and other imperfections, then 240 grit to remove scratches made by the 120 (if there is no tear-out start with 240 grit). Finish sand with 400 grit. Quality abrasive paper is worth the added cost. - Source: Internet
- A full day in the shop will get the jewelry box built. I have marked it as a weekend-long project to complete to compensate for inexperience and additional hardware that you may want to include. It would be possible for someone with shop experience to put this project together in a single day. - Source: Internet
- Next, let’s consider the hinges. Hinges can determine how thick to make the sides of the box. I have three types of hinges here. A quadrant hinge, a stop hinge and a side rail hinge. All will only open between 95 and 105 degrees so the top is held upright when the box is opened. - Source: Internet
- If you already have an old jewelry box, you can use it as the base for your DIY jewelry box creation. Some paint can go a long way into completely transforming the box into something more befitting your style. Additionally, the burlap gives it a slightly rustic appearance while the aged look on the paint offers up that pleasing vintage feel. This allows the jewelry box to come across as both classic and updated at the same time. The project is one that works out well with different shaped jewelry boxes, so feel free to experiment with various colors on these jewelry boxes. - Source: Internet
- Adding the musical mechanism, also called the movement, to your jewelry box is super easy and such a fun way to customize your DIY projects. Sold for around $8-10 on Amazon, these wind up mechanisms come in a nice variety of 18-note songs. They use a small handle that you screw onto the mechanism to wind it. Any other style will be different than described below to install. - Source: Internet
- Here is a simple jewelry box made with a geometric pattern, quite easy. In making this you will need a wooden box, acrylic paints, brushes of your choice, an HB pencil for sketching out your work also a black sharpie, ruler, etc. The link below gives a proper analysis of this creation. - Source: Internet
- You can easily make your own jewelry box with the help of a CNC router. The sides are made of walnut, which has a beautiful dark color that makes it look very stylish and modern. It’s best to start with a paper sketch so you can quickly work out how many sides and inlays you need. This design is 2.5D because it’s simpler to cut than a complete 3D design but still looks great, especially when lit up from underneath. - Source: Internet
- Place the largest, bottommost piece of the inlay design inside of the beveled lid. Since no 2 jewelry boxes will have the exact same shape inside, you might need to trim a little bit with a pair of scissors to get the piece to fit neatly inside the space. First mark the backside of the pieces with a pen and make a small mark on the lid that corresponds and will be hidden by the layered veneer. This will make sure you get the pieces to fit together again correctly. - Source: Internet
- With this list of 24 DIY Jewelry Box Ideas, you can organize your jewelry and keep it safe instead of seeing everything fall or get tangled. With these different shapes and materials, you can simply make a jewelry box for yourself according to your desires. The information will provide the necessary details to build the best jewelry boxes at home by letting you make different types of shapes and different styles that suit your needs. Even if you do not have any idea on how to create this jewelry box, you can use these ideas and create the thing according to your own taste. So let’s get started! - Source: Internet
- There are some amazing vintage images of nature and animals that any lover of the outdoors will appreciate. All you need is a simple wooden box, and you can form a remarkable jewelry box out of it with that nature theme. The classic appearance further sells the images too. Your jewelry box then is more distinctive and fun to use to store all your jewels. Create as many sections as you please so that it can fit jewelry pieces of different sizes as well. - Source: Internet
- The final build in the plans comes in at about 13 inches L x 7.25 inches W x 13.875 inches H. These plans use framing lumber, project boards, and plywood to create the box and drawers. But joints reinforced with fasteners are employed here, and they should provide you with plenty of strength for the types of items it is intended to hold. - Source: Internet
- Cut up the velvet to wrap around each roll of batting and use the glue gun to glue it on. The velvet doesn’t have to reach all the way around since the exposed batting will just be on the bottom side of the box. Make sure to leave excess velvet on each end of the batting to tuck under once squeezed into the box. - Source: Internet
- Douglas fir Is another top wood that you will find easy to work with and is ideal for making jewelry boxes. It is a wood common to Asia and the West Coast of America. Although it is a softwood, it is surprisingly hard and durable, making it a preferred choice for construction material. Although Douglas fir takes stain well, you can get better results by applying a finish. - Source: Internet
- The first jewelry box was created by a man named John Farris and was invented in the early 1800s. The first jewelry boxes were made out of wood and were used to store jewelry. These jewelry boxes were usually decorated with carvings or paintings. - Source: Internet
- The traditional jewelry box is an excellent gift item that you can give to your loved one. This DIY tutorial on how to make a traditional jewelry box will help you in making one of the best gifts you have ever made in life. You can use the ornament that was given by your boyfriend or husband or any other memorable ornaments to store it safely. It looks beautiful when kept on display so that you could use it as a home decor item too. - Source: Internet
- Popular Woodworking showcases fantastic builds, including this project that uses several types of woods. The project cost will vary, depending upon your current stock or the price you need to pay to get nice wood. A piece of spalted wood highlights the lid center, and contrasting woods like Cherry, Mahogony, or Walnut create the rest of the box exterior. - Source: Internet
- All classy and fancy. Making a wooden jewelry box with drawers needs patience and you have to be good with woodworking. After proper analysis and a perfect cut of the wood. Applying glue on the edge and sides to keep it all together. - Source: Internet
- Going thrift shopping is always a fun way to come across something useful if you don’t already have an old jewelry box to play around with. This DIY project doesn’t take much, but it does help you create something appealing and eye-catching compared to the standard brown-toned box that was before. Opting for a lighter color with the paint is a good way to let the box jump out, easily becoming a stylish fixture in your room rather than just something useful for storage. Plus, this gives you space to add some nice accent coloring to the box. Even the slight weathered appearances add more personality to the piece. - Source: Internet
- You’ll require hinges and a simple satin ribbon which will serve as a lock for the box. Simple woodworking tools are enough to make this exciting design. A beginner can also complete the style in about 30 minutes without hitches. - Source: Internet
- It is perfect for giving her (or him!) a surprise with a beautiful gift. It is a unique way to surprise your gift recipients, and your completely handmade items will give it special meaning. Even if you are a beginner in the woodworking field, as long as you have high-quality wood and materials, it is still easy to read this jewelry box plan carefully. The program records each step and a list of required materials. - Source: Internet
- Although you can buy jewelry boxes online, as a woodworker, you will find creating jewelry boxes from wood a highly satisfying woodworking project. You can make jewelry boxes for your friends and family as gifts. You can even make it into a lucrative business venture if you can commercialize it in the right way. - Source: Internet
- You need to use plywood (or veneered MDF) for the bottom rather than solid wood in this design because it must be glued into the rebate in the walls of the box. Plywood and MDF are relatively stable sheet materials and they don’t expand or shrink along or across the grain. Solid wood will expand and contract across the grain only, not along it, as the moisture in the air changes with the seasons. If solid wood is glued into the bottom of the box it may crack when it shrinks in drier weather, or push the box apart as it expands in wetter times of the year. You can’t really stop a piece of wood expanding or shrinking across the grain, so it is better to remain aware of the phenomenon. - Source: Internet
- Then take the box apart. When making a box, you glue the top on, then cut the box to make a recessed top. I’m going to allocate 5/8" for that recessed top since the wood for the top is only a bit over 1/4". You can’t make this too small or the screws for the hinges will come out the top. - Source: Internet
- The magnet inside the box holds the jewelry in place as they hang on your walls or sits on tables. The floral patterns in the box make it even more beautiful. An intermediate skill level is enough to make this handing box design and a work time of around 5-7 hours. - Source: Internet
- Prepare yourself for spring because here is a perfect DIY project to try! This DIY felt jewelry box is fantastic and super quick to make. With a wooden box, some paints, and other little decorations, you can make a cute home for your rings, necklaces, and earrings. If you want to make it personal, add some initials or small pictures on its side. It is small enough to fit on your table when not in use but large enough to store all your jewelry neatly. - Source: Internet
- Its grain is not exceptionally attractive, so you may not select this wood based on its external appearance. However, if you apply a stain or paint the surface after sanding it adequately, you can get some satisfactory results. Hence, from this perspective, you can make some reasonably decent jewelry boxes from poplar. - Source: Internet
- Jewelry boxes serve both a functional and a aesthetic purpose. They keep your jewelry organized and safe from damage, and they also add a touch of elegance to your room. Whether you have a large collection of jewelry or just a few favorite pieces, jewelry boxes are a great way to protect and display your jewelry. - Source: Internet
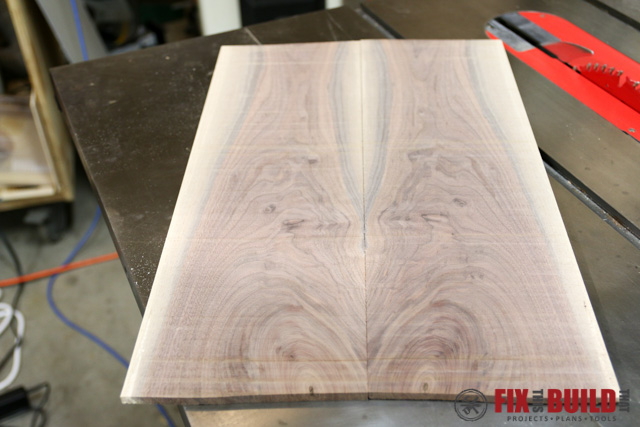
- This wooden box is 10x5 and 3 high and the ratio is 2.1 making it look big enough but not too big. In achieving this magic you will need a little wood. The creator made use of walnut with some nice figures to make the top and bottom. - Source: Internet
- I had another piece of figured walnut, 3/4" thick, about 3" wide and about 24" long. I resawed that piece to get two pieces about 1/4" thick, about 3" wide and 24" long. I glued those two pieces together to use for the top of the box. I would prefer that the top be thicker but that’s what I had as scrap wood so I’m going to work with it. - Source: Internet
- The lid can be a focal point of any box. I’ve used rebates for a shadow line and a piece of wild wood growth for a handle. The handle is placed asymmetrically but there is no real reason to do that. I thought it looked good there — it also covered the existing hole from when this wood was a drawer front. - Source: Internet
- Here’s a fun plan to begin with. In it, you’ll learn how to transform any box you happen to have lying about into a convenient and stylish place to organize all your jewelry. It’s easy to copy and will hardly cost anything, making it a plan we’re sure lots of people will want to have a go at copying themselves. - Source: Internet
- The glued-in ply bottom helps keep the box together so it is good to make it fit without gaps. I used the plane and shooting board to trim it for a snug fit. A heavy weight placed on the bottom will hold it in place while the glue dries. - Source: Internet
- You may need to use a wood paste filler to make the surface a bit smoother because of the rather coarse grain of this wood. Another word of caution: avoid getting the dust on your hands or clothes to prevent staining. Padauk doesn’t rot easily, and it is sufficiently durable and resistant to abrasion. You will find this wood highly suitable for making some nifty jewelry boxes! - Source: Internet
- This is another extremely inexpensive plan for a jewelry box since this one is made using nothing more than cardboard, paper and glue. However, that doesn’t mean it ends up looking cheap – far from it. As you can see at the end of the video, the finished job is stylish and artistic, so if you’re looking for an enjoyable craft project to tackle, this could be just what you need. - Source: Internet
- Jewelry Boxes are a necessity in a girl’s life. Considering how expensive and delicate jewelry can be, having your own unique box to keep all your pieces in is utterly essential. We’ve compiled 24 DIY Jewelry Box Ideas to help you create a special place for your jewelry so you can admire it every day. From a jewelry drawer to an elegant display case, find inspiration for your next project! - Source: Internet
- This is a DIY project that anyone can do. It is a perfect gift for any special occasion; it is also an excellent way to keep your jewelry safe, organized, and together. The box itself consists of two mirror doors that open up to display all its beauty inside it. The box has been made from wood which can be painted in any color if you desire. There are detailed instructions with step-by-step images that will help you along the way. - Source: Internet
- Here’s an original design for a jewelry box that’s essentially made of newspaper. However, it looks way better than it probably sounds, and it’s also extremely easy to customize it to match your own style. It’s a great idea that will hardly cost anything to copy, so why not check it out and see what you think? - Source: Internet
- I was originally going to paint the box white (who knew it?) but then gray called me when I kept seeing it in kitchens. I adore this color SO much. It’s a healthy alternative to a stark white and still has the same minimal feel, it’s just a bit more interesting, yea? - Source: Internet
- I’m doing this box for this tutorial. If I wanted to make a “show piece” I’d choose one long piece of wood for the sides so that the grain would match on three corners. And I’d have a thicker top. But I’m going with scrap that I have in the shop. - Source: Internet
- A block plane, drill, 0.75-inch chisel, table saw, stacked dado set, box joint jig, and a small Phillips-head screw driver. How long it will take: Six to eight hours/Two days - Source: Internet
- This simple and cost-effective jewelry box is a great DIY project that people of any skill level can make. You only need a few simple materials and tools to make this. It’s a great way to store jewelry and other items, making them much easier to find when you need them. It’s portable, so you can use it to hold your grandma’s jewelry or even as a valentine box for your partner. - Source: Internet
- Do you like to make things with your own hands? If so, you’ll love these jewelry box build projects! Not only are they a fun way to spend an afternoon, but you can also create beautiful jewelry boxes that will last for years. In this blog post, we will show you how to build five different jewelry boxes using woodworking techniques. So grab your tools and let’s get started! - Source: Internet
- Other than helping you keep things tidy and less cluttered, a DIY jewelry box is simply a nice way to get in touch with your artistic side. You can design a jewelry box in any shape, size, and color that you may not easily buy in a store. Also, homemade jewelry boxes can make for incredible and personal gifts to family and friends. They are a way of representing your personality and style, leaving a lasting impression on anyone. Thanks to the list of our favorite best DIY jewelry box ideas, you should come away with a plan for your next DIY project. - Source: Internet
- If you enjoy making your own craft and love DIY projects, you will love this! All you need is an old box and decorative materials such as canvas fabric, foam, cardboard, glitter paper, and so on. The size of the box you choose for this project doesn’t matter because its shape can vary. This particular jewelry box has been made out of a simple cardboard box with colorful designs printed on it. - Source: Internet
- The instructions are numbered between 1 and 30, making the steps easy to follow. Box joints and grooves are not hard to make on the table saw, especially with a box-joint jig. A good router table will allow you to chamfer pieces without needing table saw cuts or hand planes. You can either buy one or go the DIY route. - Source: Internet
- Tips for Making Handcrafted Wooden Jewelry Boxes For an original design, you can make your own wooden jewelry box. If you are new to woodworking, you can learn simple patterns from craft books and find free box plans online at sites like Jim Barry’s Woodworkers’ Workshop. The Internet has free jewelry box plans for all woodworking skill levels from beginners to skilled craftsman. Here are some tips for making handcrafted wooden jewelry boxes: To save money, pick a less expensive wood, such as oak or poplar, for your beginner projects and practice pieces until you get more skilled. - Source: Internet
- Forget the cheesy, mass-produced jewelry boxes of your youth. This walnut box was carefully crafted with care out of natural walnut that was harvested by hand. By itself, the wood is stunningly beautiful, but when paired with the perfect fabric interior and a hidden hinged lid, the result is graceful and lovely. This item can be used as an anniversary gift, birthday gift, or even a housewarming gift. - Source: Internet
- Truly, when you begin researching which type of wood is best for making a jewelry box, you are going to find just about every wood imaginable. However, to select the right type of wood for your use, you need to consider many perspectives. Fortunately, since you will not require too much wood for this smaller project, your budget might be a bit broadened. Let’s take a closer look. - Source: Internet
- Cardboards are simple to find and can be used for a variety of stuff. In making this jewelry box, Firstly you need to cut out the excessive part in your cardboard box, measure the desired part with your wrapping paper, and glue it properly. Design your inner part and your box is ready. - Source: Internet
- In categorizing this handmade jewelry box I will say it’s unique, inexpensive, exquisite, and not easy to forget. This serves as a perfect gift for Mother’s day, all you need is a fence post cap. The tip in making this is to ensure proper fitting, apply spray paint, add a handle and a piece of soft fabric inside. Viola! - Source: Internet
- Using decorative materials you could make an impressive jewelry box, you could create this in any shape. You will need an old box, canvas fabric, foam, cardboard, glitter paper, etc. The most stunning part of this DIY is that you can make different enclosures as you thrill. - Source: Internet
- You can take a standard, old-school jewelry box and create something that looks more long-lasting and attractive. It does still have that classic look to it, but it does so in a way that is chic and filled with personality and style. Honestly, what you are left with looks more vintage than it began, but in the best way possible. It looks more like an heirloom to pass down, one that anyone would love to have. With a nice varnish, not only does the piece shine, but it lasts far longer. - Source: Internet
- Pecan is another great type of wood used to make a jewelry box. It is less expensive than cherry, but it still has a beautiful wood grain that can add to its design appeal. Truly, it is sometimes an overlooked yet a stunning type of wood to select. - Source: Internet
- This DIY book jewelry box is simple and quite easy. The creator used an old book to make this beauty. The link below gives more guidelines on how to accomplish this. - Source: Internet
- Good morning, my Cutting Edge Stencils friends. Sometimes accessories are too cute to shove into an old box. We want you to consider giving your jewelry box a dose of personality and pattern using our stencil designs. Come see a stencil project that is as adorable as it is easy! - Source: Internet
- Making this is super easy, all fun and less expensive. You will need a sheet of felt, a wooden box, paint, ruler, etc. You choose whatever design suits you. - Source: Internet
- Your dimensioning, building, and clean-up will take more than a day. Adding glue time and finishing will mean this takes more than a weekend to build. If you match grains, use contrasting woods, and buy clean brass hardware, you will end up with an heirloom-quality jewelry box. - Source: Internet
- Here is a simple and classy jewelry box. You will need a wood box, screwdriver, wood filler, paint, etc. The inner part of this box is covered in velvet to give it a perfect look. Making this looks very luxurious and less expensive. - Source: Internet
- This DIY Musical Jewelry Box with Veneer Inlay Design is made using this specific unfished wood jewelry box available at Amazon. You can use any music box you’d like but I’d look for one that has a lip around the top of the lid for the design to fit neatly within. You also need a box with removable trays inside so that you can hide away the little metal music mechanism. - Source: Internet
- If you are looking to build a wooden jewelry box, then this is the tutorial for you. It is easy to follow, and step-by-step instructions make it simple even for beginners. You will find out how to make a jewelry box with drawers or compartments that fit neatly inside with plenty of room for all your items. This is perfect for keeping your precious jewelry in one place and safe from damage such as dust or breakage. - Source: Internet
- This mark will be a bit wide because of the pencil width so take that into consideration when cutting the bottom. Keep doing trial fits until the MDF is just short of the beginning of the groove on both sides. If you make the MDF too long, you won’t be able to put the box together. - Source: Internet
- Let’s walk through the steps for completing this adorable project. First we rounded up the supplies needed which included a small wooden jewelry box from Michaels ($5.99), a two inch dense foam roller, a stencil brush, blue painter’s tape, Martha Stewart craft paint in Rose Gold, Blush Pink and White, and our Nagoya Card Stencil. - Source: Internet
- To put the box together, you can use a variety of joinery techniques, with dovetails being a popular choice. However, I cannot include dovetails in this tutorial because it would become a very long tutorial. I’m going to use a fairly simple glued miter joint. I have tutorials on dovetails so if you want to do dovetails, please see one of those tutorials. - Source: Internet
- Now my mom probably doesn’t remember the movie all that well because she was probably doing a puzzle on her tablet. But she was there when we all watched a movie and the boys fell in love with one of the movies I love most in this world. And so I thought it would be pretty darn nifty to make a DIY musical jewelry box for my mother that took a song from “Spirited Away”. As an added bonus, the top also features a gorgeous inlay design I cut with my Cricut Maker. - Source: Internet
- Wooden Jewelry Box Designs Wooden jewelry boxes come in a number of designs that can appeal to people of all ages and tastes. There are whimsical styles aimed at children, feminine designs for women and tailored ones for men. The boxes come in all sizes ranging from small ring-sized containers and classic single-compartment rectangle boxes to large chests with multiple partitions for all types of jewelry. Examples of wood jewelry box designs includes the following: Musical single-compartment rectangular wood box with twirling ballerina figure inside - Source: Internet
- You might think that the inside of a jewelry box wouldn’t need to be cleaned very often. However, over time dust and other particles can build up, making it difficult to keep your jewelry clean. Here are some tips on how to clean the inside of a jewelry box: - Source: Internet
- Making a small jewelry box can be effective and it helps maintain your favorite collections. This box is made out of cardboard and glue. In making this exact type you need to use the measurement provided in the above link. You will need fabric or wallpaper, cardboard, cutting board, etc. - Source: Internet
- The DIY Wooden Jewelry Box is a great DIY project and a creative way to display your precious jewelry. This beautiful, decorative wood box has an octagonal shape, and you can decorate the exterior however you like! You’ll need glue, paint, and some other supplies to complete this project. By using the product link below, you can learn more about how to create this project yourself and even purchase supplies. - Source: Internet
- As mentioned above, many factors go into choosing the right wood for making a jewelry box. Most often, this is because this special piece is for a loved one, or it will hold heirloom jewelry that can be passed down (or has been passed down) in your family for generations to come. So, you do not want to mess up by getting the wrong type of wood. - Source: Internet
- I lucked out by finding a gorgeous layered design in Cricut Design Space meant for a greeting card. It was easily modified the design to specifically fit the lid for this jewelry box. You can access the ready to cut veneer inlay design here. If you need a different size, you can access the original design by searching for #M38495B (Gilded Floral Card). - Source: Internet
- Some of the best DIY jewelry box ideas come from upcycling. In this case, you can repurpose a standard cigar box and transform it into a lovely jewelry box. With how bare the inside of a cigar box is, you have near limitless opportunities here to set up the box for any type of jewelry you wish. Add different sections if you’d like, making room for items as small as rings and as long as necklaces. This is a nice way to elevate what is usually a plain cigar box into something more beautiful and elegant, something that works well for your jewelry storage needs. - Source: Internet
- Once the glue is dry trim the excess length and plane the inserts flush. Be careful when planing endgrain. Endgrain will plane fine with a sharp plane blade but always plane into the centre of the box to avoid chipping the unsupported timber on the outside. If you do accidently chip the wood, glue the splinter back in straight away using masking tape to hold it until the glue dries. - Source: Internet
- It uses trays with several compartments to house your jewelry. The DIY lover uses thin sheet hardwood to make the trays with as many compartments as possible. The tray is covered with soft fabric for color and to protect the jewelry. - Source: Internet
- Jewelry boxes allow you to experiment with joinery, cutting, and glue-ups. You do not need a lot of wood for these projects, making it possible to splurge on exotic woods and quality hardware. They build quickly, and you will not need lots of room, so give one of these plans a try over the weekend! - Source: Internet
- It is a jewelry box plan for beginners. Use one of the plans to make jewelry boxes for yourself, your lover, or female friends, and create a gift they will cherish for many years. After all, handmade gifts are always precious. It is an excellent way to add storage space to many pieces of jewelry. Girls will like jewelry boxes that can help them organize all the jewelry. - Source: Internet
- The solid lid with a curve, along with the box joints used for assembly, are features that warranted this project’s inclusion on the list. These plans call for Oak, and I think it offers grain patterns that complement the box joinery. Hardboard comes in thin sheets, making it an option for the tray and interior bottom pieces. - Source: Internet
- The glam box is all beauty and glam. In making this the first step is spraying your box with a finishing spray. The creator made use of mirror titles and also blink wraps. I recommend this for a perfect jewelry box. - Source: Internet
- Creating a wooden jewelry box with drawers is an easy process, but the technique and skill are what really determine the distance between you and an average DIYer. This instructable is designed to walk you through the steps in making your own as well as give some tips on various aspects of the project. You will be able to choose from a variety of different wood types or even different colors or patterns. - Source: Internet
- While still upside down, apply a strong adhesive to the open end of small wooden candle cups. Place them adhesive side down on the four corners of the box to act as feet and give some room for the handle to turn as the music plays. Remove the cups and give the glue a few seconds to become tacky. Replace the feet and allow the glue time to dry, several hours is good but overnight is best. - Source: Internet
- Cut a strip of batting the same width as the inside of the box and roll it up. The batting length I used was about 6.5″. Use a glue gun to glue down the end of the strip. I used two layers of batting and the rolls ended up being too thick, so I’d say sticking to one layer is sufficient. - Source: Internet
- Are you planning to make a jewelry box for yourself, or maybe as a gift to your loved ones on some special occasion? Then don’t worry. This tutorial will make your task a lot easier. All you need is a wooden box, acrylic paints, brushes of your choice, an HB pencil for sketching out your work also, a black sharpie, a ruler, and any other tools you may have lying around. You will learn how to make a simple geometric patterned box with easy steps. After reading this post, you will be able to create different types of boxes as per your own choice and requirement. - Source: Internet
- This is a perfect gift for your sweetheart. If you are looking for an unusual way to express your love and affection, then this is what you have been looking for. This can be used as a jewelry box, or it can be simply used for decorative purposes. The artist has designed it with great care and attention so that you can enjoy the creation from all angles. With different shades, patterns, and paper textures, you can create this pretty box that’s sure to please any woman in your life! - Source: Internet
- The first thing we did was paint the exterior of the box. We painted the top in white and the bottom in pink. With the painted box and all of our materials on hand, we were ready to start stenciling. We sprayed the stencil with repositionable spray adhesive. When the adhesive felt slightly tacky but not overly wet (about 5 minutes after spraying) we then placed it on top of the box. - Source: Internet
- These plans build a box measuring 10 inches L x 5 inches W x 3 inches H. Material thickness for pieces was 0.25-inches. Those dimensions are easy to modify if you want a larger box. - Source: Internet
- Mix 1:1 Grey Sky and Texture Sand Medium. Brush onto the surface of the jewelry box, leaving parts of the baseboat showing. Leave the paint to dry fully. - Source: Internet
- Begin by selecting your wood for the walls and plane to thickness and width. Highly figured wood is great to use in a box and it can be a dominant feature, but if you are new to woodworking I recommend using a stable, easy to work timber like mahogany or black walnut. The box shown above is made from recycled wood — a Tasmanian oak floorboard, a jarrah floor joist, an old Queensland maple drawer front and some odd wood growth for the handle. The base is an offcut of 4mm ply veneered in black walnut. - Source: Internet
- White oak will last literally for decades if you look after it properly. It is also known as “whiskey barrel wood,” as it was initially used to make whiskey barrels. This wood has considerable resistance to rot but needs to be oiled or painted to add to its durability. It shows its grain very beautifully with stain or varnish. You would do well to make a jewelry box out of this wood. - Source: Internet
- If you want a slightly simple DIY jewelry box project, then you can take a classic jewelry box and make it over with some paint and mod podge. Chalk paint can help give the jewelry box a weathered appearance, making it the perfect touch of vintage for that retro vibe. The mod podge offers a lovely way for you to get a specific design pattern on the box, creating any sort of thing you can think of that best fits your style. Although a simpler means of giving a jewelry box a makeover, this project leaves behind something that is vibrant and almost relaxed in a way. - Source: Internet
- Avoid the temptation of becoming too ambitious in your first project or to. Start with a simple basic jewelry box. Once you have created a few boxes successfully, you can build more complicated pieces. - Source: Internet
- This rather extensive crafting project lets you design a homemade box for jewels from the ground up. It is certainly a hands-on project to tackle, but the result is a compelling and beautiful storage item whether for yourself or to give as a gift. The wood is smooth and truly gleams, giving off that classic jewelry box look. At the same time, the polka dots give it a pop of color as well as a more carefree and charming look. It’s such a design that lets the jewelry box have an updated quality to it. - Source: Internet
- This DIY book jewelry box is simple and relatively easy to make. Anyone can do it with a little bit of patience. With the availability of cheap and old books, you can also make a beautiful DIY jewelry box. The designer used an old book to make this beauty, with a few modifications. To make your own, check out the link below for guidelines on how to accomplish this masterpiece. - Source: Internet
- I shoved in the rolls of the velvet covered batting into the box while tucking in the ends underneath each roll. I also used a popsicle stick to further tuck in the velvet on the sides. The rolls should be so tightly packed that gluing them in isn’t necessary. - Source: Internet
- Both finishes are great but require practice so consider testing your finishes on a scrap piece of properly prepared wood prior to coating your box. This box project was designed to practise some key hand and router skills and make a functional object at the same time. You can experiment with different box forms or move onto different designs. - Source: Internet
- As this DIYer tells us, part of the reason she wanted to make her own DIY jewelry box was that she couldn’t find one in a store with all the features she wanted. That seems to make a lot of sense, and if it’s a situation you can relate to, this is a plan that should appeal since it teaches you how to make one to your own specs. Of course, you’ll have to adapt her ideas to meet your needs, but at least her plan should give you a few ideas about how to get started. - Source: Internet
- There are many, many ways to make a box, limited only by your imagination. For this tutorial, I had to choose one style, and since it’s a beginner’s box, I chose a fairly simple design. But, as you will see, even a simple box has a lot of steps. - Source: Internet
- There are several ways you can create a homemade box for jewels to help keep all your important items in one place. Custom-made jewelry boxes offer the perfect way to store exactly what you want to keep treasured. This way, you no longer have to take time trying to find the right jewelry box in the store to suit your specific needs. - Source: Internet
- It is a jewelry box project of John Malecki. The production of this jewelry box originated from his love story. Now the hostess of the jewelry he made has become his wife. The jewelry box is very delicate. - Source: Internet
- In making a mod podge wooden jewelry box you will need a scrapbook, matching fabrics, wooden box, matching paints, etc. After cleaning up your box, you apply your paint inside of the box and you apply mod podge all over your scrapbook. The final Magic is adding your fabric. - Source: Internet
- The storage box is very posh. Perfect for watches and bracelets. The creator made use of a cardboard box, toilet paper tubes, or a cardboard roll to the desired size of your jewelry, cling wrap them, and voila it’s ready. - Source: Internet
- Yellowheart has a pale to bright yellow color with a bit of gold to some extent. Although the sapwood is lighter, you may not be able to differentiate it from the heartwood, which is almost just as pale as the sapwood. The interlocked grains can be straight or wavy. After sanding, this wood takes on a luxurious luster, making it an excellent choice for making jewelry boxes. - Source: Internet
- If you’re like this blogger and have all your jewelry sitting in a big, disorganized pile, the best solution is to make an organizer to keep it all in order. And if that sounds like an option you might like to try, here’s a plan that will show you how to do it. It’s a fun project to attempt, and you’ll end up with a beautiful box to keep all your jewelry in. So what are you waiting for? - Source: Internet
- In this post, you’ll learn how to make an attractive jewelry box in just eight simple steps. It looks totally cute when it’s done, and there’s plenty of scope for adapting the design to give the box your own personal touch. This is another plan we enjoyed a lot – great work! - Source: Internet
- The cabinet contains over four drawers, opening sides on either side, and the top of the drawer. You can close all the sides to keep the jewelry out of sight. The plan will require a large quantity of plywood and board since the cabinet is large and a skilled worker to complete it. - Source: Internet
- Chances are good you have an old, perhaps even vintage, wooden jewelry box lying around collecting dust. Giving a jewelry box some DIY love with paint can give it a quick makeover you’ll be proud to display. So, how do you paint a jewelry box? To paint a jewelry box, you must first take off existing hardware. Then use spray paint, chalk paint, or other furniture appropriate paint, getting in all of the nooks and crannies. Spray paint is the fastest method and can provide a nice, even finish. - Source: Internet
- The first plan I want to look at has two stand-out features. It is a small box, so you can use more exotic woods (the author uses curly Maple) without spending a lot of money. Also, the plan highlights the usefulness of a drum sander with these types of projects. - Source: Internet
- Boxes are great woodworking projects, they are quick and fun to make as well as being useful. This project is a simple jewellery box with a drop-in lid that you can easily make in a weekend even if you haven’t had much woodworking experience. It is designed so you can practise marking out, sawing, planing and using a router. - Source: Internet
- Remove any hardware on the box with a screwdriver and fill in the remaining holes with wood filler. My box had a square engraving on top that I didn’t want, so I filled that with wood filler too. Once the filler is dry, paint the box with at least three coats of paint with drying in between. - Source: Internet
- This jewelry box is perfect for those who like decorated paper which creates surface designs with lovely patterns. This marbled jewelry box is a perfect design on its own made using a cigar box. The beauty in this baby is about experimentation. You will need a few materials. Follow the directions in the link below and you will enjoy what you’ve created. - Source: Internet
- This walnut jewelry box is creativity at its peak. You could use anything to make a jewelry box, just go creative. Here the creator uses walnut and after cleaning the inner part of it placed a perfect glued fabric inside of it, cutting out the excess. Viola. - Source: Internet
- There’s no need to spend lots of money buying an expensive jewelry box when you can make a stylish version of your own from cardboard. We have to say it looks amazing when it’s done – this YouTuber is clearly very talented. And if you want to own a box just like it, all you have to do is follow her plan to make one for yourself. - Source: Internet
- Your table saw will handle the joinery and dimensioning of your Oak boards. A box-joint jig is a must, so you need to build one or buy a prefabricated product. The dado stack makes clean joints in one pass, but you can also make several passes with a single blade. - Source: Internet
- Additionally, a homemade box for jewels is a nice way to add to your specific style of décor in whatever room you’re going to use it in. This can especially work out well in a child’s room or even as a family DIY art project. Designing a jewelry box gives you the freedom to push as far as your creativity and imagination can go. Alongside that, a handmade jewelry box can be a sentimental item, something worth passing down within your family. On that note, they can also make for wonderful and meaningful gifts. - Source: Internet
- Christmas is coming! Are you ready for Christmas gifts for the female friends around you? If you don’t have a clue right now, you can consider giving the jewelry boxes that girls all need as gifts. It will not look precious but also highlight its intentions. Girls love beauty and want to make themselves beautiful. Jewelry that highlights their temperament is indispensable, and the jewelry box is closely related to it! - Source: Internet
- We wanted to continue the pattern along the lid, so we turned the box on its side. Then we placed blue painter’s tape along the pink ridge. The stencil was positioned on the white lid and a stencil brush was used to paint the pattern in rose gold. We dipped the brush into the paint and then brushed off any excess on a piece of paper towel. - Source: Internet
- In this video John takes an old TV stand a client sent back to him, and turn it into a beautiful jewelry box for his girlfriend’s 30th birthday. He uses Wenge wood , which is awful, and white oak to make the hand cut half blind dovetail drawers. He uses a router to make all the slides, and he takes a hunk of solid brass and use basic woodworking tools to make custom drawer pulls. - Source: Internet
- Gently screw through the holes in the bottom into the mechanism to hold in place. Do not overtighten screws or you could risk stripping them. Add the handle to wind the music box. - Source: Internet
- Who knew just how useful that toilet paper roll could be? With it, you can make a unique jewelry box container. It is such an adorable little box too, and of course not meant for any large storage. However, it offers just enough to keep smaller items at bay. Also, thanks to how compact the toilet paper roll naturally is, this can fit easily enough on a nightstand or dresser tucked safely out of the way. You can even make numerous of these to your heart’s content, elevating them so that they’re filled with style. - Source: Internet
- Cutting pieces and fitting them tight will take up most of your time, as you want there to be no gaps. Sanding and center-framing tips will save you time, but this will be a full-day project to build up for most of us. Gluing and finishing will make the jewelry box a weekend project. - Source: Internet
- Turn the bottom of the box over and place it paint dot side down onto the surface. Tape into place. Using a drill bit as close to the width of the screws that came with the mechanism, drill THREE holes around the outer edge. - Source: Internet
- Ever gotten a new phone yet had no idea what to do with that phone box? Well, consider saving it since you can turn it into something remarkable. These smartphone boxes typically have a good thickness to them, making them perfectly suitable for supporting some of your precious jewelry. This is a great way to recycle a box that would otherwise be tossed aside and instead, you can build something that you can use time and time again. Plus, it’s always handy to keep your jewelry safe while traveling whether on the road or on a plane. - Source: Internet
- This simple jewelry box is inexpensive, very portable, and can be made in big or small sizes. Can be gifted as well and it’s super easy. You will need cardboard in making this and other simple materials including glue, etc. - Source: Internet
- Beech Is another wood that is heavy and sturdy. It is a light-colored wood with a tight grain that enables it to take polish quite well. A jewelry box made of beech will have an impressive appearance. It is a wood that is easy to work with by hand, and you will find that it responds well to power tools as well. - Source: Internet
- Do you love that celestial look? You can create something compelling and unique using such designs to make a gorgeous jewelry box. There is a vintage look about the paint job itself what with allowing it to look peeled or weathered. Alongside that, the particular art style of the sun and the moon, all with distinctive faces, further cements this jewelry box into that artistic classic look. This will look incredible on its own as a decorative piece in any room, but it can especially look right at home in a room with a similar theme like a child’s bedroom. - Source: Internet
- You’ll notice that I did not remove all of the hardware on the jewelry box I painted yellow. These were attached with small nails vs. the screws. - Source: Internet
- [Side note: If you want more support on the miters, you can put in an “ff” biscuit on each corner. I won’t describe how to do that here, but if you look at my tray tutorial, I explain how to cut the slots for the biscuits there. If you do use biscuits, make SURE that the biscuits are put in low enough that you won’t cut through them when making the top. It’s embarrassing to have a biscuit showing when you open the box.] - Source: Internet
- If you want to learn how to build a simple jewelry box, then this is the guide for you. This video takes you through the process of designing and building a small jewelry box from scratch. It is surprisingly easy, cheap, and will give you hours of fun while at it. Your homemade jewelry box can be used as a gift box or to store some of your precious items like necklaces and rings. - Source: Internet
- Now that you know what to put in a jewelry box, it’s time to start filling yours up! Be creative and have fun accessorizing your jewelry box to make it your own. After all, it’s a reflection of your personal style. jewelry box woodworking jewelry storage organization ideas. - Source: Internet
- If you think it is too troublesome to make a wooden jewelry box. Consider this simple ring jewelry box made of velvet fabric. You only need a box you don’t need and a few materials to create a practical and exquisite jewelry box by hand. This handmade jewelry box project will show you how to turn any containers you like into a jewelry box through a simple handmade project. - Source: Internet
- I milled the wood for the sides to a bit more than 1/2". You don’t want really thick wood - it reduces the amount of space inside and it doesn’t look good. Too thick wood is out of proportion to the box, which is relatively small. - Source: Internet
- Mele jewelry boxes are made with a lot of care and attention to detail. The wood used to make these jewelry boxes is usually a softwood like cedar or pine. This type of wood is easy to work with and takes stain and paint well. - Source: Internet
- If you’re looking for a simple woodworking project that will keep you occupied for a couple of hours, this could be just the kind of thing you need. This plan teaches you how to make an attractive jewelry box that won’t cost you more than around $9. That way, you can save yourself a bit of money to spend on more jewelry to fill it with! - Source: Internet
- To select the right kind of wood for making a jewelry box, remember that you are using a smaller amount of wood, so you might be able to select a more typically expensive choice. However, if you are new to woodworking, consider a cheaper option. Then, choose a type that can stain beautifully or has a natural color that you like, and one that is easy to work with. - Source: Internet
- This DIY jewelry box is simple and less expensive to create. You will need cardboard shaped into your desired size, glue to help put it in place. This type of jewelry box helps you with different compartments. - Source: Internet
- Creating jewelry boxes is one of the most rewarding woodworking projects that you can undertake. Jewelry boxes make fantastic gifts, and presenting a handcrafted jewelry box to someone close to you will give you a great sense of satisfaction. However, if you are a bit resourceful, you can create exquisite wooden items like jewelry boxes and make your woodworking project into a profitable business venture. - Source: Internet
- Hickory is unique in what it can bring to the table for a jewelry box. Hickory heartwood is darker in color, but the sapwood is a brighter yellowish color. This can add a highly contrasting coloration appeal that sends many people into awe. - Source: Internet
- We get jewelry boxes in all shapes and sizes. People of all ages and social groups use jewelry boxes. You can find jewelry boxes for children, women, and even men. A jewelry box may be a small, little enclosure for a single ring, or multiple-compartment boxes containing many different pieces of jewelry. - Source: Internet
- This is a quick and super brilliant storage idea mostly for rings. You will need an empty chocolate box insert, ruler, glue, pencil felt. Basically in making this, you need to measure and match your felt piece to the chocolate. On each square of felt, you make two dots and draw a short line, cut and apply glue Voila your storage box is created. - Source: Internet
- The production of this convenient small jewelry box is much simpler. The jewelry box is mainly composed of two ordinary small plastic boxes, the exterior is made of PU leather, and the cardboard in the middle is used for earrings. The two-layer design and practical compartment design help you store enough small items such as earrings, bracelets, brooches, necklaces, etc. - Source: Internet
- Did you know that mod podge and scrapbooking supplies can also make a beautiful wooden jewelry box? All you need is some extra paint, a few scrapbooks, and fabrics. You can make a wonderful gift out of this type of creation because it will be different than any other jewelry chest in your jewelry armoire. The process of making this homemade gift really is not complicated at all, but it does require quite a bit of time, so be sure to plan accordingly! - Source: Internet
- Traditional jewelry box is mostly used by brides to store their ornament. The creator made use of acrylic colors, decoupage glue, craft paper, MDF box. Firstly, color your box, cut your papers to your measurement, apply the decoupage glue and paste your papers. - Source: Internet
- Because it is made of wood, more tools were used during the period, including two drawers, so the construction is more complicated. The 15 steps, tools, and materials needed to make this jewelry box are all in this materials list. This list of each step and required tools and materials is very detailed, and there are related videos and pictures. - Source: Internet
- Stained glass has such a classy and timeless look about it that it can be the perfect design choice for your DIY jewelry box. Using a glass jewelry box to start with goes a long way into giving the paint job more authenticity. You can even come up with a distinct design too, sketching it out so that it is as precise as possible. This is such a nice way to create something colorful, vibrant, and full of life. Adding the stained glass effect to the top section while leaving the rest the plain glass color draws your eye to the painting too. - Source: Internet
- This beautiful wooden jewelry box is perfect for stashing your baubles and trinkets in. Simply craft it using only a 12cm wooden base, some plastic canvas, design fabric, and some beads! All the material required to create a valuable item for yourself for daily use, gift for your near and dear ones, or as a decoration of your home/office. You can even use the same design to make small sewing or jewelry cases. - Source: Internet
- This handmade jewelry box can store all your accessories without you having to rummage through your closet. This isn’t an easy project, and it may take some trying, but the end result is worth all the effort by far. It serves as a perfect gift for Mother’s day; all you need is a fence post cap. The tip in making this is to ensure proper fitting, apply spray paint, and add a handle and a piece of soft fabric inside. Viola! - Source: Internet
- Building a simple jewelry box is affordable. The creator made use of woods, cut out into sizes and desired lengths. If you’re good with woods I’ll recommend this. Easy and fun. - Source: Internet
- This is a creative idea for an inexpensive jewelry box that’s based on a cookie tin. We loved seeing the box take shape, and the peaceful, relaxing music makes the video a pleasure to watch. The box is a convenient item to own too, so why not see if you can make something similar? - Source: Internet
- Here’s another plan for a cute jewelry box that lots of people will enjoy making themselves. The plan is super-easy to copy, and it only requires a few inexpensive items that you can easily pick up at your local craft store. It looks highly professional too, so if you like the design, why not see if you can make something similar? - Source: Internet
 Here are a few tips to help you find information about Diy Jewelry Box Kit:
- Look for good places to get information about How To Make A Jewelry Box With Drawers. This can be done in libraries, on websites, or even by paid journalists.
- When looking for information about How To Make A Jewelry Box With Drawers, it's important to know that there are different kinds of online sources, like Google and YouTube. Social media sites like Facebook and Twitter are also good places to look for information about Easy Jewelry Box.
Here are a few tips to help you find information about Diy Jewelry Box Kit:
- Look for good places to get information about How To Make A Jewelry Box With Drawers. This can be done in libraries, on websites, or even by paid journalists.
- When looking for information about How To Make A Jewelry Box With Drawers, it's important to know that there are different kinds of online sources, like Google and YouTube. Social media sites like Facebook and Twitter are also good places to look for information about Easy Jewelry Box.Video | How To Make A Small Jewelry Box Out Of Wood
To get the best information about 21 Pretty DIY Jewelry Box Ideas that will De-clutter Your Room, you should read to find out how true each source is.
This article has a few videos from different places about 6 Free Wooden Jewelry Box Plans To Build This Weekend that will help you learn more about it. The Internet is a great place to find out about a wide range of things.
## Here are some crucial points concerning Wood Jewelry Box:- How To Make A Small Jewelry Box Out Of Wood
- How To Make A Simple Jewelry Box Out Of Wood
- How To Make A Small Wood Jewelry Box
- How To Make A Small Wooden Jewelry Box
- How To Make A Simple Wooden Jewelry Box

With so many websites and forums that talk about Simple Wooden Jewelry Box, it shouldn’t be hard to find what you need.
Most people are used to getting information about 27 DIY jewelry box Ideas: Homemade Jewelry Boxes in a very different way than this. It lets you look at the information about Simple Wooden Jewelry Box and how it can be used in more detail.
 ways to put information about Diy Wooden Jewelry Box Kit in a way that looks good and is useful. They can be used in business and marketing, and they can also be used to talk about How To Build A Jewelry Box Out Of Wood. So, we also give you some pictures about How To Make A Jewellery Box Out Of Cardboard.
In the end, this article gives a summary of Simple Jewelry Box. Also talked about are Wooden Jewelry Box Plans Pdf and 13 Free DIY Jewelry Box Plans (Design & Ideas), which you can use to compare how much you know about How To Make A Small Jewelry Box Out Of Paper.
